A finished paver surface can look level on installation day and still fail within a season if the soil below wasn’t prepared correctly. Paver soil preparation controls drainage, stability, and how well brick pavers hold their line over time.
This problem appears in paver patio projects, walkways, and driveways laid over loose dirt or uneven sand. The pavers are rarely the problem. The prepared soil and support layers below them usually are.
Careful excavation, grading, drainage planning, and controlled compaction give your project the support it needs before installation begins. These recommendations are general guidance, since soil type, climate, drainage conditions, and local requirements can change the design.
Key Takeaways
- Set the finished grade and drainage path before excavation, with the surface generally sloping away from structures.
- Excavate for the complete paver system, including pavers, bedding sand, and a properly sized compacted aggregate base.
- Remove organic, saturated, pumping, or unstable soil before placing stone; use geotextile fabric only when site conditions require separation.
- Place aggregate in 2- to 4-inch loose lifts and compact each lift thoroughly with the correct equipment.
- Match the base depth and preparation method to the soil, drainage, climate, and intended use, especially for driveways and difficult sites.
Paver Soil Preparation Starts With a Clear Site Plan
Measure the area, mark the finished edges, and decide where water will go before excavation begins. A small layout mistake can create a larger drainage or elevation problem later.
Call 811 before any digging
Call 811 before starting excavation, even if no surface equipment is visible. Contact 811 Before You Dig, then wait for the required utility markings and site instructions.
This free service helps identify utility lines that could be damaged by shovels, machinery, or stakes. Keep the markings visible while laying out the project, and adjust the plan if a utility line affects the design.
Establish the finished height and slope
Check door thresholds, garage floors, gates, pool coping, drains, and existing walkways when setting grade. The finished paver surface must sit at a practical height around each of these areas.
Most patios need a slope of about 1% to 2% away from the house. A 2% slope equals approximately 1/4 inch of fall per foot. Local stormwater rules, accessibility requirements, soil conditions, and site elevations may require a different design, but surface drainage should direct drainage away from structures and neighboring property.
Use stakes, string lines, a level, or a laser level to establish the finished grade. Work backward from that line to determine how much soil must come out.
Excavate for the Pavers, Sand, and Base Rock
Excavate the area based on the total thickness of the pavers, bedding layer, and support system. Don’t excavate only for the stone, since the finished grade must accommodate every layer.
For general guidance, a typical pedestrian patio or walkway needs at least 6 inches of paver base. This compacted aggregate support layer sits beneath the bedding sand. Most brick pavers are about 2 3/8 inches thick, and bedding sand is usually about 1 inch after screeding. This often puts excavation around 9 to 10 inches below the final surface, depending on the selected paver.
Use deeper base material for brick driveways
Patios, pedestrian walkways, and driveways have different load requirements. Driveways carry daily vehicular traffic, so their soil and aggregate support need more strength.
In favorable Southwest Florida conditions, 6 to 8 inches of aggregate may be a starting point. Weak soil, frequent heavy vehicles, poor drainage, and soft areas can require 8 to 12 inches or more. Adjust driveway thickness for soil strength, drainage, climate, heavy vehicles, and local specifications.
The specified amount of base material below the pavers should be based on its finished depth. Measure the compacted base after compaction, not when loose aggregate first arrives. Loose stone settles during compaction, so ordering only the finished depth will leave you short.
Before aggregate placement, remove sod, roots, organic matter, debris, and visibly unstable soil. Buried vegetation can decay and encourage weed growth beneath the surface.
Proof-roll or walk the exposed subgrade to identify pumping and soft spots. Don’t cover saturated or yielding soil with stone until those areas are repaired and stabilized.
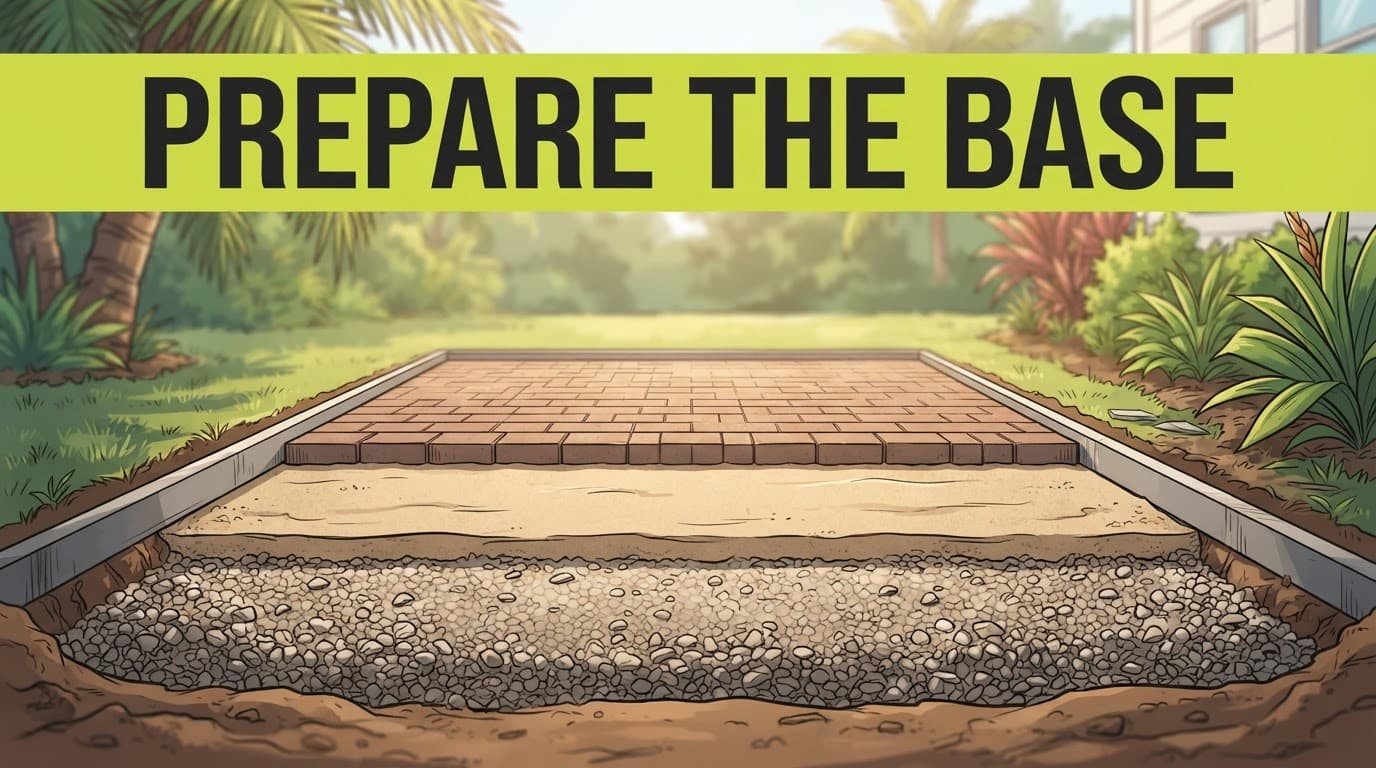
Excavate beyond the planned paver edges so the edge restraint is supported by stable material. Follow the restraint manufacturer’s installation details and local requirements. A restraint installed on loose soil can move outward and allow the pavers to spread.
For driveway projects, our brick paver driveway installation guidance explains why grading and a firm crushed-stone base are part of a long-lasting surface.
Choose Materials That Let the Base Drain
The sub-base materials should lock together when compacted while still allowing moisture to move through the system. Crushed aggregate is the standard choice because it supports pavers and spreads loads across the prepared soil.
A properly graded, angular gravel base should lock together under compaction while still allowing appropriate drainage through the paver base.
Install geotextile fabric when soil needs separation
Woven geotextile fabric may be appropriate over clay, silt, pumping sand, or other unstable soil. It separates the native subgrade from the aggregate, but it isn’t a substitute for removing saturated or highly organic soil.
Florida sand may not require fabric on every site. The decision depends on soil conditions, drainage, and the performance of a test area or professional assessment. If the subgrade pumps, ruts, or feels soft under equipment, remove weak material and rebuild it instead of covering it with more aggregate.
Never use plastic sheeting beneath a paver base. Plastic can hold water under the surface, interfere with drainage, and create a wet layer below the installation.
A prepared base needs separation from poor soil when necessary, but it also needs a path for water to drain.
Use bedding sand, not stone dust
After the base is compacted and graded, install clean, properly graded concrete sand that meets the paver or system specifications, usually about 1 inch thick after screeding. Permeable systems may require ASTM #9 chip stone or another manufacturer-specified material instead.
Avoid limestone screenings and similar fine materials as a bedding layer. They can become dense when wet and don’t provide the consistent setting bed needed for interlocking pavers.
Screed the material between rails to a uniform depth with a straight screed board. Don’t compact it before laying the pavers. Once it is screeded, avoid walking over it or disturbing the grade.
Calculate Aggregate Before It Arrives
A good material order prevents delays, extra delivery charges, and piles of unused stone. For an aggregate layer, multiply the project length by its width and desired finished depth to calculate compacted volume.
Use a simple volume formula
For example, a 12-by-20-foot patio with a 6-inch finished depth requires:
| Measurement | Calculation | Result |
|---|---|---|
| Area | 12 x 20 feet | 240 square feet |
| Compacted base depth | 6 inches divided by 12 | 0.5 feet |
| Aggregate volume | 240 x 0.5 | 120 cubic feet |
| Cubic yards | 120 divided by 27 | 4.44 cubic yards |
Suppliers often sell aggregate by the ton. Weight varies with stone size and moisture, so ask your supplier for its conversion rate and actual density. At 1.35 tons per cubic yard, plan for about 6 tons, plus compaction, waste, moisture, access, and density allowances.
Use the same formula for concrete sand, based on the planned screeded thickness. A 1-inch layer under a 240-square-foot patio needs about 20 cubic feet, or roughly 0.74 cubic yards. Verify this estimate against the paver manufacturer’s specifications.
For more help with base-depth planning, review our guide to calculating paver base material.
Compact the Gravel Base in Controlled Lifts
Compaction is where many do-it-yourself paver projects lose their support. The paver base must be placed and compacted in controlled lifts, not dumped into a deep excavation and compacted only at the top.
Build the aggregate layer 2 to 4 inches at a time
Spread the base material evenly in loose lifts of 2 to 4 inches. Avoid dumping a deep pile that can’t be compacted through its full depth.
For patios and driveways, use a plate compactor for more reliable results. A hand tamper can work for a very small walkway or repair area, but larger areas need thorough compaction, especially where vehicular traffic is expected.
The aggregate should be at the moisture level recommended by the supplier. Slightly damp material may compact well, but don’t compact saturated material until the problem is corrected.
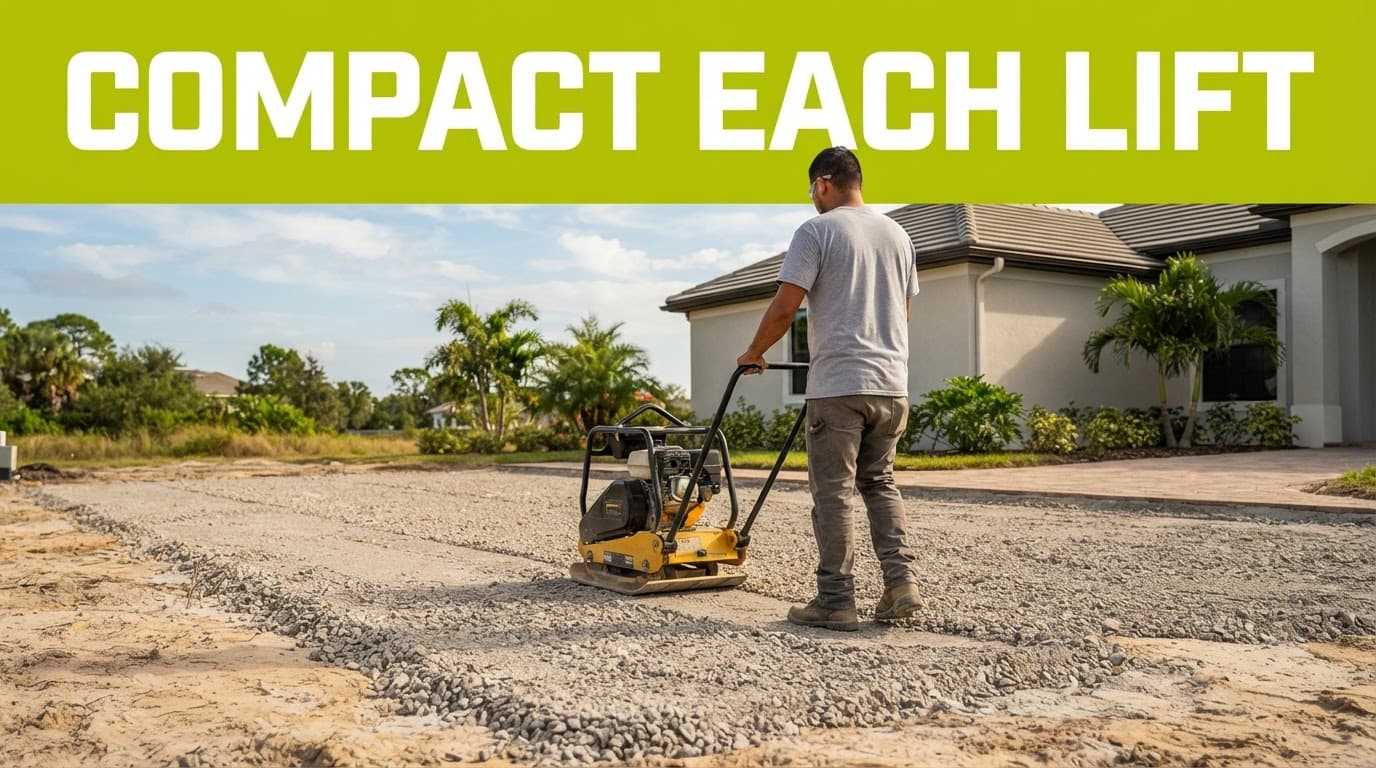
With the plate compactor, overlap each pass across the entire lift and repeat passes until the material is stable. Pay extra attention to transitions, corners, and outer edges.
The compacted base should be firm, even, and consistent with the planned slope before bedding sand is added. Check it with a long straightedge and level, then verify that the slope survived compaction. Correct dips now, because pavers will follow every low spot underneath them.
If the base continues to pump or won’t compact, stop and obtain site-specific help instead of simply adding more aggregate.
Adjust the Plan for Clay, Rain, and Tight Access
Every site has different soil conditions, and dry, firm sand, clay, saturated soil, and fill can require different preparation methods. Even a small paver patio in a low, wet area may need a different base design. Warm-climate practices from Southwest Florida may not apply in frost-prone regions, so follow local specifications.
Handle difficult soil before adding stone
Clay soil can retain water and move as moisture levels change. In frost-prone regions, freeze-thaw cycles can shift the subgrade below a paver surface. Repeated freeze-thaw cycles may justify deeper excavation, drainage improvements, or geotechnical input. Geotextile fabric can separate unstable or fine-grained soil, but it doesn’t replace removing saturated, organic, or structurally weak soil. Ask an experienced installer when conditions can’t be evaluated confidently.
Don’t build over saturated soil. Pause when you see standing water, footprints, rutting, or pumping. Let the area dry when appropriate, improve drainage, or remove and replace weak soil. Use a plate compactor only on a stable, appropriately moist lift, not to force compaction into standing water. Wet soil may look firm briefly but often settles later.
Keep tight-access projects organized
Narrow side yards and fenced backyards make excavation and material delivery harder. Plan where excavated soil will go before digging begins. A driveway, front staging area, dumpster, or scheduled hauling service may be needed. On driveway projects, vehicular traffic makes access planning and soil damage more consequential.
For small spaces, plan staging before work begins and avoid repeatedly pushing a wheelbarrow across finished base material. Work in manageable sections: remove soil, bring in aggregate, compact each lift, and continue across the area. This reduces traffic over finished base material and keeps the work area manageable.

Photo by Jan van der Wolf
Protect the Prepared Base Before Installation
Once the bedding layer is screeded, don’t drag a screed board, tools, materials, or equipment across the finished surface. Install the pavers carefully. If the system requires an edge restraint, place it on a stable supporting layer and anchor it according to the paver system, manufacturer instructions, and local requirements. Then sweep joint sand into the finished joints.
Polymeric sand can help lock the pavers together after installation. Make sure the joints are clean and dry before activation, and follow the manufacturer’s sweeping, cleaning, and watering instructions. Excess sand left on the brick surface can leave a haze after activation.
Routine sweeping helps keep joints clear of leaves and debris. If you need pressure washing later, use the lowest effective pressure and avoid directing water into the joints. Replace joint sand if washing removes it. Aggressive cleaning can create uneven marks, loosen pavers, and reduce stability under vehicle loads.
Frequently Asked Questions
How deep should I excavate for brick pavers?
A typical pedestrian patio or walkway often needs about 6 inches of compacted paver base, approximately 1 inch of bedding sand, and pavers that are about 2 3/8 inches thick. This commonly results in excavation about 9 to 10 inches below the finished surface, but soil conditions and project use can change the required depth.
Can I install pavers over wet or soft soil?
Do not cover saturated, pumping, or yielding soil with aggregate. Allow the area to drain or dry when appropriate, then remove and replace weak material or obtain site-specific guidance before continuing.
Do I need geotextile fabric under pavers?
Geotextile fabric may help separate aggregate from clay, silt, pumping sand, or other unstable soil. It is not required on every site and does not replace removing organic or structurally weak soil; never use plastic sheeting as a substitute.
How should I compact the paver base?
Spread the aggregate in loose lifts of about 2 to 4 inches and compact each lift across the entire area, overlapping passes. A plate compactor is generally more reliable for patios and driveways than a hand tamper, and the finished base should be firm, even, and properly sloped.
Does a driveway need a deeper base than a patio?
Usually, yes, because driveways carry repeated vehicle loads. A driveway may need 8 to 12 inches or more of aggregate in weak soil, poor drainage, or heavy-use conditions, so the final design should account for local specifications and site conditions.
Build the Surface From the Ground Up
Successful paver soil preparation follows a clear sequence:
- Locate utilities before digging.
- Set the finished grade and drainage path.
- Assess the subgrade and correct weak or unstable areas.
- Choose suitable separation materials and aggregate.
- Build a properly graded paver base, then compact it in controlled lifts.
- Protect the finished surface until installation begins.
Match the support system to the intended use. Patios and walkways generally need less support than driveways carrying vehicular traffic.
General depth ranges don’t replace local code, manufacturer’s specifications, or a site-specific assessment. Get professional help for persistent water, unstable fill, significant slopes, frost-prone sites, difficult utility conditions, or surfaces planned for substantial vehicle loads.